
Image Source: i.ytimg.com
Why Treat Your Teak Garden Furniture?
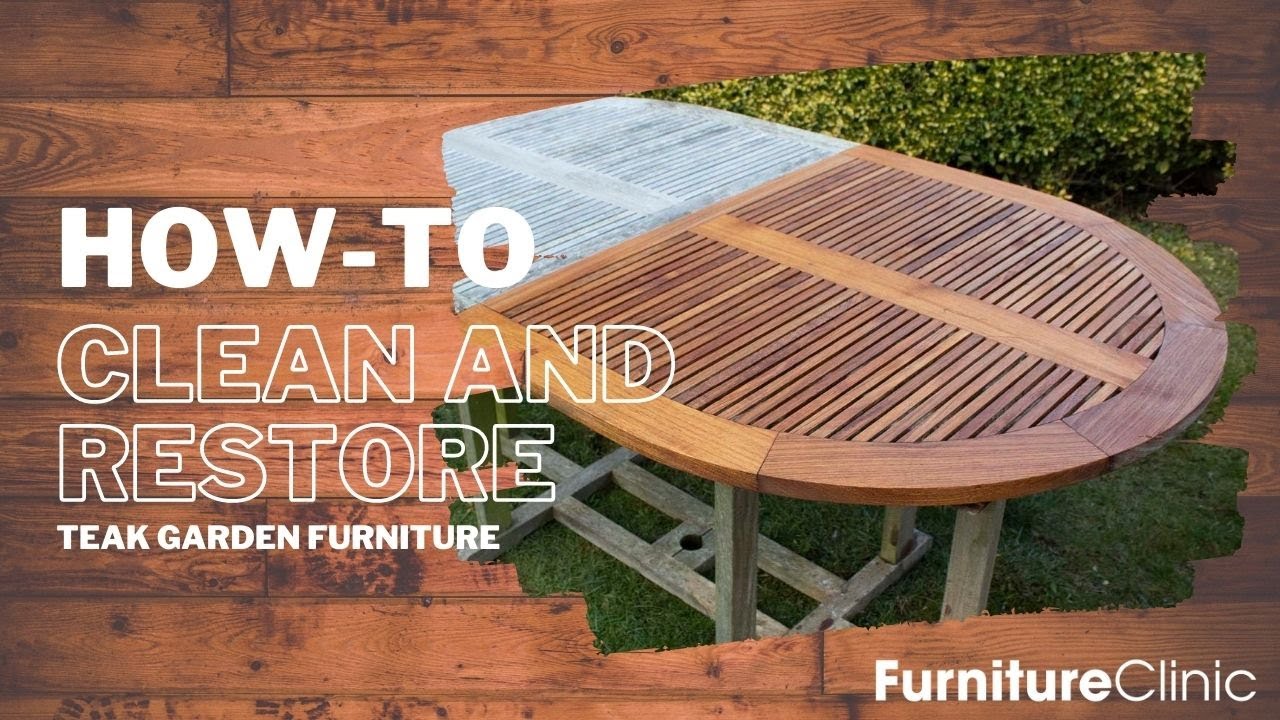
Teak garden furniture is a beautiful choice for outside spaces. It is known for being strong and lasting a long time. But even tough teak needs care. Over time, sun, rain, and dirt change its look. It can turn a silvery-gray color. Some people like this look. Others want to keep the warm, golden-brown color of new teak. Treating your teak helps keep its color, protects it from stains, and makes it last even longer. This guide shows you how to clean, restore, and protect your teak furniture step by step. It will help you with teak garden furniture maintenance.
Grasping Why Teak Changes Outdoors
Teak wood has natural oils. These oils help it stand up to bad weather. They make teak strong against water, bugs, and rot. But when teak is outside, the sun’s rays (UV light) and rain wash these oils away slowly from the surface. This makes the wood change color. It loses its rich, golden tone. It turns gray. This gray color is just the top layer of wood drying out. The wood under the surface is still strong.
Wind blows dirt onto the wood. Rain can cause stains. Mold and mildew can grow in wet spots. All these things change how your furniture looks. Proper care helps fight these problems. It helps protect outdoor teak furniture.
Deciding If You Should Treat Teak
You have a choice with teak furniture.
Option 1: Let it turn gray. Many people like this natural, weathered look. The gray color shows the wood has aged outside. If you pick this, you still need to clean it sometimes. Cleaning stops dirt buildup and keeps mold away. This is low teak garden furniture maintenance.
Option 2: Keep the golden color. This needs more work. You need to clean the wood. Then you might use a product to restore the color. After that, you apply a protector like a sealer or oil. This needs regular care to keep the color bright. You refinish teak garden set to make it look new.
This guide will show you how to do both. We will cover cleaning for the gray look and cleaning/treating for the golden look.
Step 1: Getting Ready for the Job
Before you start cleaning or treating, get all your tools and supplies together. This makes the work go smoothly. Work on a day that is not too hot. Pick a spot where the furniture can dry well. It’s best if you work outside in a place that won’t get wet right after you finish.
Here is what you will likely need:
- Cleaning Supplies:
- Buckets (2)
- Soft bristled brush or sponge
- Hose with spray nozzle
- Teak cleaner (made for teak)
- Gloves (rubber)
- Safety glasses
- Restoration Supplies (if needed):
- Teak brightener or restorer
- Fine-grit sandpaper (180-220 grit)
- Optional: Orbital sander for large areas (use low speed, be gentle)
- Treatment Supplies (if needed):
- Teak oil or teak sealer
- Clean rags or foam brushes
- Paint tray or container
- Drop cloths or plastic sheeting
- More gloves
- Optional: Mineral spirits (for teak oil cleanup)
Table: Needed Supplies
| Purpose | Items | Notes |
|---|---|---|
| Cleaning | Buckets, Soft brush, Sponge, Hose, Cleaner | Use a cleaner made for teak wood. |
| Gloves, Safety glasses | Protect your skin and eyes. | |
| Restoring | Teak brightener, Sandpaper (180-220 grit) | Use gently to remove gray layer. |
| Sander (optional) | Makes work faster on big pieces. | |
| Treating | Teak oil OR Teak sealer | Pick one based on the look you want. |
| Rags, Foam brushes, Tray | For putting on the treatment. | |
| Drop cloths | Protect the ground from drips. | |
| Gloves | Keep your hands clean. |
Read the directions on all product bottles before you start. This helps you use them the right way.
Step 2: Cleaning the Furniture Well
Cleaning is a very important step. It removes dirt, grime, mold, and that gray surface layer. You must clean the wood before you apply any treatment. Treatment put on dirty wood will not stick right. It will not look good. This step is key to clean weathered teak furniture. It also helps prevent mildew on teak.
Here are the steps for cleaning:
h4: Clearing and Prepping the Area
Move the furniture to your workspace.
Put down drop cloths under the furniture. This catches drips. It protects your patio or grass.
Brush off loose dirt and leaves from the furniture.
h4: Wetting the Wood
Wet the furniture all over with a hose.
Use a normal spray. Do not use a high-pressure washer. High pressure can hurt the wood fibers.
Keep the wood wet while you clean.
h4: Applying Teak Cleaner
Mix your teak cleaner in a bucket following the product’s directions. Some cleaners are ready to use. Some need water added.
Put on your gloves and safety glasses.
Dip your brush or sponge into the cleaner mix.
Start cleaning a small part of the furniture.
Brush the cleaner onto the wood.
Work with the grain of the wood. This is the direction the lines go in the wood.
Scrub gently. Do not scrub too hard. Hard scrubbing can harm the wood.
You will see dirt and gray color lifting off.
h4: Scrubbing and Cleaning
Work your way over the whole piece of furniture.
Keep the wood wet. If a spot dries, wet it again before putting cleaner on it.
For tough spots like mold or dark stains, you might need to scrub a little more.
Make sure to clean all parts. Clean the legs, arms, and back. Clean under the seats.
Let the cleaner sit for a few minutes. Follow the time on the product label. Do not let it dry on the wood.
h4: Rinsing Off the Cleaner
Rinse the cleaner off the furniture completely.
Use your hose. Start from the top and work down.
Rinse until no more soap or foam comes off.
Make sure all cleaner is gone from cracks and corners.
Leftover cleaner can damage the wood or stop new treatments from sticking.
h4: Second Wash (If Needed)
If the furniture is still dirty or gray after the first wash, you can wash it again.
Or, you can move to the next step, restoring color, if the gray is deep in the wood.
h4: Let the Wood Dry
Let the furniture dry fully.
This takes time. It might take 24 to 48 hours. It depends on the weather and how wet the wood got.
Feel the wood. It must feel dry to the touch everywhere.
Do not rush this step. The wood must be dry for the next steps.
Cleaning alone might be enough for some people. If you want the gray look, just clean it when it gets dirty. This simple step helps prevent mildew on teak and keeps it looking nice.
Step 3: Bringing Back the Color
After cleaning, your teak furniture might still look gray. This gray is a thin layer of worn wood. To restore gray teak to a golden color, you need to remove this layer. You can use a teak brightener or sand the wood lightly. This is part of how you refinish teak garden set.
h4: Using a Teak Brightener
Teak brighteners are liquids you put on the wood. They react with the gray wood fibers. They make the wood look more golden. They are usually a simpler way than sanding.
Steps for using a brightener:
- Make sure the wood is clean and a little damp (check the product label).
- Put on gloves and safety glasses.
- Pour the brightener into a clean bucket or tray.
- Apply the brightener with a brush or sponge. Work with the wood grain.
- Cover all the gray areas you want to restore.
- Let it sit for the time the product says (usually 5-15 minutes). You might see the color change.
- Rinse the wood very well with water. Rinse until all the brightener is gone.
- Let the wood dry completely again. This might take another day or two.
Brighteners can be strong. Be careful with plants or other things near where you work.
h4: Sanding to Restore Color
Sanding removes the top gray layer of wood. This shows the fresh, golden wood under it. Sanding takes more work than brighteners. But it can make the wood very smooth. It is good for furniture that is very gray or rough.
Steps for sanding:
- Make sure the wood is totally dry.
- Start with 180-grit sandpaper. This is a medium-fine paper.
- Wrap the sandpaper around a sanding block. Or use an orbital sander. If using a sander, use light pressure. Keep the sander moving.
- Sand with the grain of the wood. Never sand across the grain. This will make scratches you cannot remove easily.
- Sand all the gray areas. Sand until you see the golden color come back.
- Use 220-grit sandpaper next. This is finer paper. Sand over the areas again. This makes the wood smoother.
- For curved parts or hard-to-reach spots, sand by hand.
- After sanding all areas, wipe the furniture clean. Use a clean, dry cloth or tack cloth. Get all the sawdust off. You can also use a vacuum with a brush tool.
- The wood must be clean of dust before you go to the next step.
Sanding is a good way to restore gray teak, but it takes time and effort. It is a key step if you want to fully refinish teak garden set pieces that are very worn.
After restoring, the wood should look more golden. It should feel clean and dry. Now it is ready for protection.
Step 4: Picking the Right Protection
After cleaning and maybe restoring the color, you need to protect your furniture. This helps keep the color (if you restored it). It helps prevent new stains and dirt. It also gives UV protection for teak, slowing down the graying process. The two main choices are teak oil and teak sealer. Choosing the best teak treatment products depends on what you want.
h4: Teak Oil: The Natural Look
Teak oil is not oil from teak trees. It is usually a mix of other oils (like linseed oil or tung oil) with other stuff added.
It soaks into the wood fibers.
It makes the wood look rich and brings out the grain. It gives a warm, golden look.
It is quite easy to apply.
But:
Teak oil does not protect against the sun’s UV rays very well.
It does not stop the wood from turning gray over time as much as a sealer does.
It can feed mold and mildew, making them grow faster. You need to use oil with mold stuff added.
You need to put on teak oil often. Maybe 2-4 times a year, or even more in sunny places.
It can make clothing oily if the wood is very fresh with oil.
Using teak oil gives a classic, deep wood color but needs regular work.
h4: Teak Sealer: Stronger Protection
Teak sealers are made to block the sun’s rays and stop dirt from getting in.
They usually have UV protection for teak built in.
They stop the wood from turning gray as quickly as teak oil.
They make the wood easier to clean.
They help prevent mildew on teak better than oil.
They last longer than teak oil. Maybe 1-2 years before you need to apply again.
But:
Sealants can change the color of the wood. Some are clear, some have a tint. Test a small spot first.
Some sealers can make the wood feel less like natural wood compared to oil.
Applying a sealer might be a bit harder than oil.
Sealants give better, longer-lasting protection, especially against graying and UV damage.
Table: Teak Oil vs. Teak Sealer
| Feature | Teak Oil | Teak Sealer |
|---|---|---|
| Look | Rich, golden, natural wood grain | Can be clear or slightly tinted |
| Protection | OK protection from water, light dirt | Strong protection from UV, dirt, water |
| Graying | Does not stop graying well | Stops or slows graying much better |
| UV Protection | Little to none | Often includes UV blockers |
| Mildew | Can feed mildew (unless special type) | Helps prevent mildew |
| How Often | 2-4+ times a year | 1-2 years |
| Ease of Use | Easy | Medium |
| Feel | More natural wood feel | Can feel less natural |
Think about how much work you want to do and what look you like. This helps you choose the best teak treatment products for you.
Step 5: Putting on the Protection
Once you have picked your product (teak oil or sealer) and the wood is completely dry, it is time to apply the treatment. This step helps protect outdoor teak furniture.
h4: Applying Teak Oil
Applying teak oil is quite simple.
- Make sure the wood is dry and clean of dust.
- Put down drop cloths.
- Put on gloves.
- Shake the teak oil product well.
- Pour some oil into a paint tray or container.
- Use a clean rag or foam brush. Dip it into the oil. Do not get too much on it.
- Wipe or brush a thin, even coat of oil onto the wood.
- Work with the grain of the wood.
- Cover all surfaces.
- Let the oil soak in for the time the product says (usually 10-15 minutes).
- Watch for dull spots. These spots soaked up more oil. Add a little more oil to them.
- After the soak time, wipe off all the extra oil. Use a clean, dry rag. Rub with the grain. This is very important. Extra oil left on the surface will get sticky or black.
- Let the first coat dry. This might take a few hours.
- Apply a second coat following the same steps. You might need a third coat for very dry wood.
- Wipe off all extra oil after each coat.
- Let the furniture dry fully before using it. This can take 24-48 hours.
- Dispose of oily rags safely. They can catch fire on their own. Soak them in water or lay them flat outside to dry away from anything that burns.
Using teak oil regularly keeps the wood hydrated and golden.
h4: Applying Teak Sealer
Applying teak sealer is a bit different from oil. Sealers sit more on the surface or just under it to block things out.
- Make sure the wood is totally dry and clean of dust.
- Put down drop cloths.
- Put on gloves and safety glasses.
- Shake the sealer well.
- Pour sealer into a clean container.
- Use a brush or foam applicator. Some sealers can be sprayed. Check the product label.
- Apply a thin, even coat of sealer. Work with the grain.
- Do not let the sealer puddle on the surface. Brush out any drips or thick spots.
- Cover all areas you want to protect.
- Let the first coat dry for the time the product says. It might be 1-4 hours. The can will tell you the ‘recoat time’.
- Apply a second thin coat if the product directions say to. Many sealers work best with two thin coats.
- Let the furniture dry completely before using it. This can take 24-72 hours. Check the product label for full cure time.
- Clean brushes and tools as the product says (usually with water or mineral spirits).
Apply teak sealer carefully for the best protection. It lasts longer than oil and gives great UV protection for teak.
Step 6: Keeping Up the Look
After you clean and treat your teak, you need to do some simple teak garden furniture maintenance to keep it looking good.
- Regular Cleaning: Even with treatment, furniture gets dirty. Wipe off spills right away. Clean the furniture a few times a year with mild soap (like dish soap) and water. Use a soft brush. Rinse well. This prevents dirt buildup and helps prevent mildew on teak.
- Check the Treatment: Look at your furniture every few months.
- If you used teak oil, does it look dry and faded? If water no longer beads up on the surface, it’s time for another coat of oil.
- If you used a sealer, is it wearing off? Does it still block water? If it looks worn, you might need to clean and apply another coat of sealer.
- Deal with Mold: If you see small spots of mold or mildew, clean them right away. Use a mix of water and a little bleach (about 1 cup bleach to 1 gallon water). Or use a cleaner made for mold on outdoor furniture. Scrub gently, rinse well, and let it dry. Regular cleaning helps stop mold before it starts.
- Winter Care: In cold places, it is best to store teak furniture during winter. Clean it well first. Let it dry fully. Store it in a garage, shed, or covered patio. Do not wrap it tightly in plastic. Wood needs air to breathe. Cover it loosely or just store it as is. If you must leave it outside, cover it loosely with a waterproof but breathable cover.
Good teak garden furniture maintenance keeps your furniture looking great and lasting for many years. By following these steps, you protect outdoor teak furniture from the harsh effects of the weather.
Summary of Steps
Here is a quick look at the main steps:
- Get Ready: Gather supplies (cleaner, maybe brightener/sandpaper, oil or sealer, rags, gloves, etc.).
- Clean: Wet the wood, apply teak cleaner, scrub with the grain, rinse very well, let dry completely. This helps clean weathered teak furniture and prevent mildew on teak.
- Restore (Optional): If needed, use a teak brightener or sand the wood to bring back the golden color. Sand with the grain. Wipe off dust. Let dry completely. This helps restore gray teak.
- Choose Protection: Decide if you want to use teak oil (natural look, more work) or teak sealer (stronger protection, less work). Think about the best teak treatment products for your needs.
- Apply Protection: Put on a thin, even coat of teak oil (wipe off extra) or teak sealer. Let it dry. Apply a second coat if needed. Let dry completely before using. This is how you apply teak sealer or use teak oil to protect outdoor teak furniture with UV protection for teak.
- Maintain: Clean the furniture often. Check the treatment and apply more when needed. Store properly in winter. This is ongoing teak garden furniture maintenance.
Following these steps will help you refinish teak garden set pieces or simply keep them clean and protected.
Frequently Asked Questions (FAQ)
h3: Common Questions About Teak Care
h4: What happens if I do not treat my teak furniture?
If you do not treat it, the teak will turn a silver-gray color over time. This is the natural way teak ages outside. The wood will still be strong and last a long time because of its natural oils. But it might get dirty or stained more easily.
h4: Is teak oil or teak sealer better?
It depends on what you want. Teak oil is easier to put on and gives a natural look, but needs more work and does not stop graying much. Teak sealer gives stronger protection against sun and dirt, stops graying longer, and needs less work, but might change the feel or color a little. Many people choose a sealer for less maintenance and better UV protection for teak.
h4: How often do I need to clean my teak furniture?
Clean it any time it looks dirty or stained. A good cleaning once or twice a year is often enough, even if you do not apply oil or sealer. Regular cleaning helps prevent mildew on teak.
h4: How often do I need to apply teak oil or sealer?
For teak oil, you might need to apply it every few months, maybe 2-4 times a year. For teak sealer, you usually only need to apply it every 1-2 years. Always check the product’s directions.
h4: Can I sand my teak furniture too much?
Yes, you can. Teak furniture is solid, but sanding removes a thin layer of wood each time. Only sand when needed to restore the color or smooth the wood. Use fine-grit sandpaper (180-220 grit) and sand gently with the grain. Do not use rough sandpaper or sand too deeply.
h4: How do I remove mold or mildew from teak?
Clean the area with a teak cleaner. If mold is still there, use a weak mix of bleach and water (1 cup bleach to 1 gallon water) or a cleaner made for outdoor mold. Apply it, scrub gently with a soft brush, and rinse very well. Make sure the wood dries fully afterward. Keeping the wood clean helps prevent mildew on teak.
h4: Can I use regular wood stain or varnish on teak?
It is not recommended. Teak has natural oils that stop normal stains and varnishes from sticking well. These products can peel or not dry right on teak. Use products made for teak wood like teak oil or teak sealer. These are the best teak treatment products for this type of wood.
Caring for your teak garden furniture takes some work, but it helps keep it beautiful and strong for many years. Follow these steps for cleaning, restoring, and protecting your outdoor teak furniture.