
Can I build a garden shed with concrete blocks myself? Yes, you absolutely can build a strong, lasting garden shed using concrete blocks, and doing it yourself is a rewarding project. This guide will walk you through the steps, from planning your project to putting the roof on your new block shed. Building with concrete blocks gives you a sturdy, fire-resistant, and low-maintenance structure that can handle tough weather better than many other shed types. While it takes effort and careful work, the result is a durable building perfect for storage, a workshop, or whatever you need extra space for.
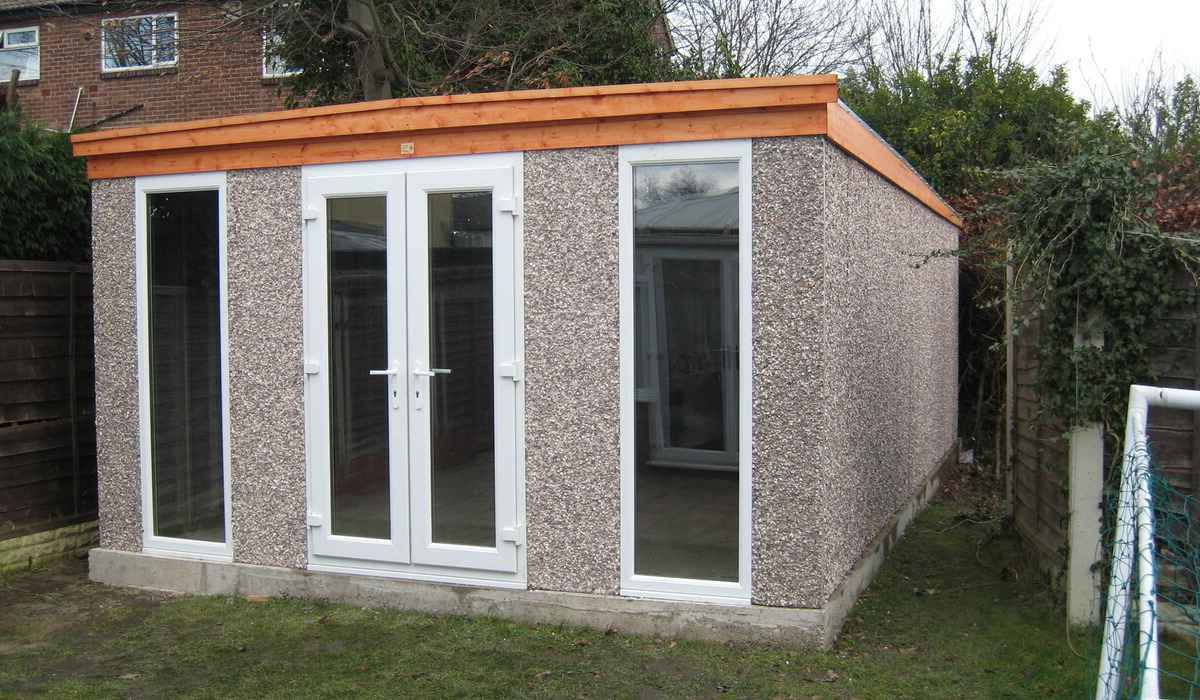
Image Source: twigandthistle.com
Preparing for Your Block Shed Project
Building a shed needs good planning. Think about where the shed will go. Make sure the spot is mostly flat and drains water away well. You also need to know what rules or permits your local government requires for new buildings. Checking this first saves problems later.
Decide on the size and shape of your shed. What will you keep in it? How much space do you need? Simple square or rectangle shapes are easier to build. Look at concrete block shed plans online or draw your own simple sketch. This plan will help you figure out how many blocks and other materials you need.
Think about doors and windows. Where will they go? How big will they be? Mark these on your plan.
Choosing the Right Place
Pick a spot that’s easy to get to but not in the way. Make sure it’s not under big trees that might drop branches or block the sun if you want light. Check for any underground pipes or wires before you start digging. Call your local utility companies if you’re not sure what’s below the ground.
Checking Local Rules
Before you start any DIY shed construction, call your local building department. Ask about zoning rules, building codes, and if you need a permit for a garden shed of the size you plan. Ignoring these rules can lead to fines or having to take down your shed.
Designing Your Shed Layout
Simple concrete block shed plans are best for a first-time builder. A basic rectangle is easiest. Think about:
* Size: How big does it need to be? (e.g., 8×10 feet, 10×12 feet)
* Height: High enough to stand in comfortably? Space for tall tools?
* Door: Single or double door? Where will it be?
* Windows: Do you need natural light? How many and where?
* Roof Type: Simple sloped (lean-to) or gable (pitched) roof? A simple slope is easier.
Draw your plan showing the size, door, and window spots. This drawing helps when ordering materials and figuring out block placement.
Getting Your Materials and Tools Ready
Building with concrete blocks needs specific items. Having everything ready before you start makes the work go smoother. Knowing the materials for block shed and having the right tools saves time and prevents frustration.
Essential Materials
Based on your concrete block shed plans, make a list of what you need.
* Concrete Blocks: Standard 8x8x16 inch blocks are common. You’ll need to figure out how many based on your shed’s size and height, plus extra for cuts or mistakes (add about 10%). You might also need half blocks or corner blocks.
* Mortar: This is the “glue” that holds the blocks together. You can buy pre-mixed bags (just add water) or mix your own from Portland cement, hydrated lime, and sand.
* Sand: Clean, washed sand for mortar mix or spreading under the foundation.
* Gravel/Crushed Stone: For the shed foundation base.
* Concrete: For the foundation slab or footings. Ready-mix is easiest for larger jobs, or you can mix bags yourself.
* Rebar (Steel Rods): To make the walls and foundation stronger.
* Anchor Bolts: To connect the wooden roof frame to the block walls.
* Lumber: For door/window frames, wall bracing, and the roof structure.
* Roofing Materials: Plywood or OSB sheathing, roofing felt, shingles or other roofing cover.
* Door and Windows: Or materials to build frames.
* Water: For mixing concrete and mortar, and cleaning.
Tools You Will Need
Building with blocks needs some specific tools:
* Shovel and Pickaxe: For digging the foundation.
* Wheelbarrow: To move dirt, gravel, concrete, and mortar.
* Tape Measure: For layout and checking sizes.
* Level (long and short): Crucial for making sure blocks are straight and flat.
* String Line and Stakes: For setting straight lines for the foundation and walls.
* Gloves and Safety Glasses: Always protect yourself.
* Mortar Hoe: For mixing mortar.
* Mortar Trowel: For spreading mortar on blocks.
* Pointing Trowel: For finishing mortar joints.
* Masonry Saw or Angle Grinder with Masonry Blade: For cutting blocks.
* Rubber Mallet: To gently tap blocks into place.
* Stiff Brush: For cleaning blocks.
* Hammer and Saw: For wood parts of the shed (frames, roof).
* Concrete Mixer (optional but recommended): Makes mixing mortar and concrete much easier for a project this size.
* Drill: For fastening wood and potentially drilling into blocks.
Lay out your materials near the building spot, but not in the way of your work area.
Building a Solid Foundation
A strong shed foundation is key for any building, especially one made of heavy concrete blocks. The foundation spreads the weight of the walls and roof evenly into the ground. For a block shed, you typically need either a concrete slab or footings with a block stem wall. A concrete slab is often simpler for a small shed.
Preparing the Site
Clear the area where the shed will go. Remove grass, plants, rocks, and topsoil. Go down about 4-6 inches below ground level across the whole area. Make the ground as flat as possible.
Mark the exact corners of your shed using stakes and string. Use the 3-4-5 rule (or measure the diagonals) to make sure the corners are square (perfect 90-degree angles).
Creating the Foundation Base (Cinder Block Shed Base Prep)
Dig down further around the edge of your marked area for the footing, or prepare the whole area for a slab.
* For a Slab: Dig down maybe 8-12 inches inside your marked area. Build a simple wood frame (formwork) around the marked area to hold the concrete. Make sure the top of the formwork is level. Put a layer of gravel or crushed stone (about 4-6 inches deep) inside the formwork. Compact this gravel layer very well using a plate compactor or hand tamper. This helps with drainage and makes a firm base.
* For Footings: Dig trenches around the perimeter where the walls will sit. These trenches should be below the frost line in your area (ask your local building department) and wide enough for the block wall (usually at least 16 inches wide for an 8-inch block wall). You’ll fill these trenches with concrete.
Pouring the Concrete
- For a Slab: Place wire mesh or rebar grid over the compacted gravel inside your formwork. Support it so it sits roughly in the middle of the concrete thickness. Order ready-mix concrete or mix bags according to instructions. Pour the concrete into the formwork, spreading it evenly. Use a straight board (a screed) to level the concrete by pulling it across the top of the formwork. Use a float to smooth the surface. Let the concrete cure (dry and harden) for several days, keeping it damp by covering it with plastic or spraying it with water.
- For Footings: Place rebar lengthwise in the trenches. You might also need to add vertical pieces that will stick up into the block walls for reinforcement. Pour concrete into the trenches, level the top, and let it cure. You will then build your first course of blocks directly on these footings.
This concrete base is your cinder block shed base. A strong base prevents cracks and settling later on.
Learning How to Mix Mortar
Mortar is the glue for your blocks. Mixing mortar correctly is important for strong walls. Too wet, and it’s weak; too dry, and it’s hard to work with.
The Right Mix
You can buy bags of pre-mixed mortar (Type S or N is common for walls). Just add the amount of water specified on the bag and mix.
If mixing from scratch (for cost or specific needs), a common mix ratio by volume is:
* 1 part Portland Cement
* 1 part Hydrated Lime
* 4 to 6 parts Clean Sand
The Mixing Process
- Measure: Measure your dry ingredients accurately.
- Combine Dry: Put the sand, cement, and lime into your mixing container (wheelbarrow or mixer). Mix the dry ingredients together thoroughly with a hoe.
- Add Water: Make a well in the center of the dry mix. Slowly add clean water while mixing.
- Mix: If using a hoe, pull the dry edges into the wet center. If using a mixer, let it run. Keep mixing until the mortar is evenly colored and has a smooth, peanut-butter-like consistency. It should stick to the trowel but not be too stiff or too runny.
- Test: A good way to test is to make a furrow in the mortar with your trowel. The furrow edges should stand up and not collapse immediately.
- Mix Small Batches: Only mix as much mortar as you can use in 1-2 hours, especially in warm weather, because it starts to harden.
Learning how to mix mortar correctly is a key skill for laying concrete blocks.
Starting to Build: Laying Concrete Blocks
This is where your shed starts to take shape! Laying concrete blocks requires patience and care to keep everything level and straight.
The First Layer (Course)
This is the most important layer. It sets the line for the rest of the wall.
1. Marking: Snap chalk lines on your foundation slab (if using one) showing where the outside edge of your first block course will go according to your concrete block shed plans.
2. Mortar Bed: Spread a bed of mortar along the chalk line. Make it a bit wider than the blocks and about 1 inch thick. Make a furrow in the center of the mortar bed with your trowel.
3. Placing Corner Blocks: Start with the corner blocks. Set them firmly into the mortar bed. Tap them gently with a rubber mallet to level them both ways (side to side and front to back) and align them with your chalk lines. Use your level to check.
4. String Line: Once the corner blocks are placed and level, run a string line tightly between the top outside corners of the blocks. This string is your guide for placing the rest of the blocks in that course.
5. Laying Blocks: Spread mortar for 3-4 blocks at a time along the line. Pick up a block, butter one end (apply mortar to the vertical edge that will meet the next block), and set it onto the mortar bed next to the previous block. Push it against the block already laid so the mortar squeezes out.
6. Checking Level and Line: Tap each block gently with the mallet to get it level and aligned with the string line. Check the level often!
7. Excess Mortar: Scrape off the mortar that squeezes out (squeeze-out) with your trowel. You can reuse this if it’s still wet.
Building the Walls (Building Shed Walls)
Once the first course is done and level, the next courses are built on top.
1. Stagger Joints: The vertical joints (head joints) between blocks should be staggered from the course below. This is like brickwork and makes the wall much stronger. Half blocks are often used to start a new course if the course below began with a full block.
2. Mortar Application: Spread mortar on the top surface (face shells) of the blocks already laid, as well as on the vertical end of the block you are about to place. Make the mortar bed about 3/8 inch to 1/2 inch thick.
3. Setting Blocks: Set the new block onto the mortar bed, sliding it against the previous block until the head joint mortar is squeezed.
4. Tap and Check: Tap the block level and aligned with the string line. Run the string line up for each new course. Use a long level to check that the wall face is straight (plumb).
5. Cleaning: Scrape off squeeze-out as you go.
This step-by-step process for laying concrete blocks and building shed walls requires patience and attention to detail. Work slowly and check your level and lines constantly.
Reinforcement and Wall Openings
Adding steel reinforcement and correctly creating openings for doors and windows are vital parts of building shed walls.
Adding Rebar
Many block walls benefit from steel rebar for extra strength, especially in areas with high winds or seismic activity.
* Vertical Rebar: Place vertical rebar pieces in some of the block cores as you build. These can be tied to the rebar in the foundation if you used it.
* Horizontal Reinforcement: Special ladder-like wire reinforcement or rebar can be laid in the mortar bed between courses.
The cores with rebar will be filled with concrete or grout later. Your concrete block shed plans or local building codes should specify if and where reinforcement is needed.
Building Door and Window Openings
You need to plan for openings as you build the walls.
1. Marking: Mark the width of your door and window openings on your first course.
2. Laying Around Openings: As you build up the wall, stop laying blocks at the edges of your planned openings.
3. Temporary Support: You might need temporary wood bracing to hold the blocks at the edges of the opening straight until the mortar sets.
4. Lintels: Above door and window openings, you need a lintel. A lintel is a strong beam that carries the weight of the blocks above the opening. Lintels can be:
* Pre-cast concrete lintels (easiest, buy these)
* Steel angles
* Lintel blocks (U-shaped blocks where you place rebar and fill with concrete)
Install the lintel level and make sure it extends onto the block wall at least 4-6 inches on each side of the opening. Then continue laying blocks on top of the lintel.
Completing the Walls: Top Course and Bond Beam
Once your walls reach the desired height according to your concrete block shed plans, you need to finish the top. A bond beam course is typically the last course of blocks.
What is a Bond Beam?
A bond beam is essentially a reinforced concrete beam built into the top of the block wall. It ties all the walls together horizontally, makes the top of the wall strong and level, and provides a place to attach the roof structure.
Building the Bond Beam
- Using Lintel Blocks: The easiest way to create a bond beam is by using U-shaped lintel blocks for the final course. These blocks have an open channel on top.
- Placing Rebar: Place continuous horizontal rebar in the channel of the lintel blocks around the entire perimeter of the shed. Lap and tie pieces of rebar where they meet to make it continuous.
- Anchor Bolts: Place anchor bolts (threaded bolts that will stick up out of the concrete) into the channel at the spacing required by your shed roof on block walls design or local code (often every 4-6 feet). These bolts will be used to attach the wooden sill plate for the roof structure. Make sure the bolts are straight and stick up high enough to go through the sill plate.
- Filling with Concrete: Mix or order concrete suitable for pumping or pouring into the narrow channel. Carefully fill the channel with concrete, making sure the rebar is fully covered and working the concrete around the anchor bolts. Level the top of the concrete with the top of the blocks.
- Curing: Let the bond beam concrete cure fully before putting weight on it.
This reinforced top course is crucial for the stability of the walls and for properly attaching the shed roof on block walls.
Putting a Roof on Block Walls
Adding a shed roof on block walls involves attaching a wooden frame to the concrete block walls and then covering it. The bond beam you created provides a solid base for this.
Attaching the Sill Plate
- Sill Plate: Cut pressure-treated lumber (usually 2×4 or 2×6) to sit on top of the bond beam. This is called the sill plate.
- Marking: Drill holes in the sill plate to match the location of the anchor bolts sticking out of the bond beam.
- Setting: Place the sill plate over the anchor bolts. Use washers and nuts to bolt the sill plate down tightly to the bond beam. Make sure the plate is straight and correctly positioned according to your roof plan.
Building the Roof Frame
The simplest roof for a shed is often a single slope (lean-to). A gable roof is more complex but offers more headroom.
- Lean-to Roof:
- Attach a ledger board horizontally along the top of one wall (the higher side of the slope), bolted to the sill plate.
- Cut rafters (the sloping beams) to the correct length and angle.
- Attach the rafters from the ledger board down to the sill plate on the opposite wall. Joist hangers can make this connection stronger.
- Gable Roof:
- Build roof trusses or cut rafters and ceiling joists individually. Trusses are often easier for DIY.
- Attach a ridge board at the peak.
- Attach rafters from the sill plates up to the ridge board.
- Add bracing to make the frame strong.
Make sure the roof frame extends beyond the walls to create eaves, which help protect the walls from rain. Your DIY shed construction plan should detail the roof structure.
Sheathing and Roofing
- Sheathing: Cover the roof frame with plywood or OSB (Oriented Strand Board) sheathing. This creates a solid surface for the roofing material. Leave a small gap (like 1/8 inch) between sheets to allow for expansion.
- Felt Paper: Roll out roofing felt (tar paper) over the sheathing, starting from the bottom edge and overlapping layers. This provides an extra layer of water protection.
- Roofing Material: Install your chosen roofing material (asphalt shingles, metal panels, etc.) according to the manufacturer’s instructions. Start from the bottom and work your way up.
Properly building the shed roof on block walls keeps your shed dry and protected.
Finishing Your Block Shed
Once the main structure is up, you can add the finishing touches.
Mortar Joints (Pointing)
The mortar joints between the blocks need to be finished. As you lay blocks, you’ll scrape off the excess mortar (struck joints). For a neater look and better weather resistance, you can go back and tool the joints with a joint tool once the mortar is “thumbprint hard” (partially set but still soft enough to shape). Common joint types are concave or V-joints, which help shed water.
Weatherproofing the Walls
While concrete blocks are strong, they can absorb water. To protect the walls and give a finished look, you can:
* Apply a Cement Render (Stucco): This is a layer of sand and cement plaster applied to the outside walls. It gives a smooth or textured finish and is very durable. It can be painted later.
* Paint Directly: Use a special elastomeric or breathable masonry paint designed for concrete or stucco. This is simpler than rendering but might not cover block imperfections as well.
* Apply a Water Repellent Sealer: A clear sealer penetrates the blocks and mortar, making them water repellent while keeping the look of the blocks.
Installing Doors and Windows
Install door frames and window frames into the openings you created. Use shims to make sure they are plumb and square. Secure the frames to the block walls using appropriate fasteners (like concrete screws or anchor bolts). Install the door slab and windows into the frames. Seal around the frames with caulk to prevent water and air leaks.
Adding a Floor (If Not Already a Slab)
If you didn’t pour a concrete slab foundation, you’ll need a floor.
* Concrete Slab: You can pour a concrete slab inside the finished walls, similar to the foundation process, making sure it’s level with or slightly above the bottom course of blocks.
* Wood Floor: Build a wooden floor frame using joists supported by the foundation walls. Cover the joists with plywood or OSB subflooring. Make sure to protect the wood from moisture coming up from the ground (e.g., using a vapor barrier).
Final Touches
- Vents: Add vents near the top and bottom of the walls or in the gable ends to allow air circulation and prevent moisture buildup inside the shed.
- Electrical (Optional): If you need power, plan for electrical work during the wall building shed walls phase or add surface-mounted conduit later. Hire a qualified electrician.
- Gutters and Downspouts: Install gutters along the eaves to direct rainwater away from the shed foundation.
Your DIY shed construction is almost complete! These finishing steps make the shed usable, weather-tight, and looking good.
Figuring Out the Cost
What is the cost to build block shed? The price varies a lot based on size, location, material choices, and how much work you do yourself.
Factors Affecting Cost
- Size of Shed: Bigger sheds need more materials (blocks, mortar, concrete, wood, roofing).
- Materials: Cost of blocks varies by type and location. Roofing materials, doors, and windows have a wide price range.
- Foundation: A full concrete slab costs more in materials than just footings, but might save labor later on the floor.
- Reinforcement: Adding rebar and grout adds to the material cost.
- Roof Complexity: A simple lean-to roof is cheaper than a gable roof with trusses.
- Finishes: Rendering walls costs more than just painting them. The type of door and windows matters.
- Labor: This is the biggest variable. Doing it yourself (DIY) saves a lot on labor costs, but you trade your time and effort. Hiring contractors for some or all of the work increases the cost significantly.
- Permits: Permit fees add to the overall cost.
Estimating Costs (DIY)
Here’s a rough breakdown for a modest-sized block shed (e.g., 8×10 or 10×12 feet) built DIY:
| Item | Estimated Cost Range (DIY) | Notes |
|---|---|---|
| Concrete Blocks | $500 – $1,500 | Based on quantity (e.g., 300-800 blocks) |
| Mortar & Sand | $100 – $300 | Bags of mix or separate cement/lime/sand |
| Concrete/Gravel | $200 – $800 | For foundation slab or footings |
| Rebar/Anchor Bolts | $50 – $150 | Steel reinforcement and wall anchors |
| Lumber | $500 – $1,000 | For roof, frames, bracing, sill plate |
| Roofing Materials | $300 – $800 | Sheathing, felt, shingles/metal |
| Door & Windows | $200 – $1,000+ | Varies greatly by type and quality |
| Fasteners/Hardware | $100 – $300 | Nails, screws, bolts, ties |
| Finishing | $100 – $500 | Paint, render materials, sealer, caulk |
| Tool Rental/Misc. | $100 – $400 | Mixer, compactor, saw blades, etc. |
| Total (Estimate) | $2,150 – $6,750+ | This is a wide range; plan carefully |
This table shows that the cost to build block shed yourself can be several thousand dollars, but is often less than hiring a contractor to build the same structure. Getting quotes for materials in your area and accurately counting the blocks from your concrete block shed plans will give you a much better estimate. Remember to factor in tool rental or purchase if you don’t own everything needed.
Tips for Successful DIY Shed Construction
- Take Your Time: Don’t rush laying concrete blocks. Patience leads to better results.
- Stay Level and Plumb: Constantly check with your level. A crooked wall is hard to fix.
- Mix Mortar Right: Consistency is key. Mix enough but not too much at once.
- Keep Blocks Clean: Scrape off excess mortar as you go. It’s much harder to remove after it dries.
- Tool Joints at the Right Time: Finishing joints too early or too late makes them look messy and weaker.
- Safety First: Wear gloves, safety glasses, and sturdy shoes. Be careful lifting heavy blocks.
- Get Help: Some steps, like pouring concrete or setting roof rafters, are much easier with a helper.
- Plan for Drainage: Make sure water drains away from the shed foundation and walls.
DIY shed construction with concrete blocks is a significant project. Start with a solid plan, get the right materials for block shed and tools, and work methodically. The result will be a shed built to last.
Frequently Asked Questions (FAQ)
How long does it take to build a block shed?
Building a block shed yourself can take anywhere from a couple of weeks to a couple of months, working weekends. The time depends on the shed size, your experience level, how much help you have, and the weather. The foundation and curing time for concrete and mortar add significant time before you can move to the next steps.
Are concrete block sheds better than wood sheds?
Concrete block sheds are generally more durable, fire-resistant, and pest-proof than wood sheds. They can also withstand severe weather better. However, they typically cost more in materials and labor to build DIY, and they don’t have the same aesthetic appeal as wood for everyone.
Do I need rebar in my block shed walls?
It is highly recommended to include rebar, especially vertical rebar in certain cores and horizontal rebar in the bond beam. This adds significant strength and stability to the walls, helping them resist cracking and forces from wind or seismic activity. Local building codes often require specific reinforcement.
Can I build a concrete block shed directly on the ground?
No, you should not build a concrete block shed directly on the ground. You need a proper shed foundation, either a concrete slab or concrete footings, that goes below the frost line and is designed to carry the weight of the block walls and roof. Building directly on the ground will likely lead to settling, cracking, and structural failure.
How do I connect the roof to the block walls?
You connect the wooden roof structure to the block walls using a sill plate that is bolted to the bond beam (the top concrete-filled course of blocks) using anchor bolts embedded in the bond beam concrete. The wooden roof rafters or trusses then attach to this sill plate.
How thick should the mortar joints be?
Mortar joints for concrete blocks are typically between 3/8 inch and 1/2 inch thick. Consistency in joint thickness is important for the look and strength of the wall.
What kind of mortar should I use?
Type S or Type N mortar is commonly used for laying concrete blocks in walls. Type S is stronger and often preferred for structural walls or areas with high winds. Type N is suitable for non-load-bearing walls or less demanding applications. Ready-mix bags are convenient for DIY builders.
Building a concrete block garden shed is a solid project that results in a very sturdy building. By following these steps carefully, you can achieve a professional and long-lasting structure.