
Does your garage floor look dull, stained, and cracked? You want a clean, strong space, but the thought of upgrading the floor feels overwhelming. Choosing the perfect Garage Floor Epoxy Kit can be tricky. You face confusing labels, too many colors, and worries about messy application. Many kits promise perfection but deliver disappointing results, leaving you with sticky floors or patchy finishes.
Don’t let a drab floor drag down your home improvement dreams! This guide cuts through the noise. We will break down exactly what you need to know to pick a high-quality, user-friendly epoxy kit. You will learn the secrets to achieving a professional-looking, durable floor that lasts for years.
Ready to transform that messy concrete into a showroom-worthy surface? Keep reading as we dive into the best tips and essential steps for selecting your ideal Garage Floor Epoxy Kit today.
Top Garage Floor Epoxy Kit Recommendations
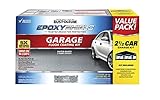
- Durable, 2-part epoxy formula works on interior concrete surfaces, such as garage floors, workshops, basements and more
- Professional glossy finish is easy to clean and provides a long lasting protection that is 5X harder than 1-part epoxy floor paint
- Walk on ready in 24 hours, vehicle and drive-on ready in 3 days
- Superior adhesion coating ensures no hot tire pickup and protects against gasoline, antifreeze, motor oil, and salt
- Low odor, low VOC gloss finish provides a show room shine

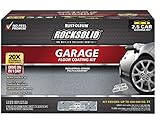
- Durable, polycuramine concrete coating works on interior concrete surfaces including garage floors, workshops, basements, family rooms and more
- Self-leveling, buildable formula is 20X stronger than epoxy with low odor and low VOC - portioned in a two-part, patented burst pouch
- Complete projects quickly; coating is walk on ready in 8-10 hours and vehicle ready within 24 hours
- Each kit covers up to 500 sq. ft. depending upon surface porosity; no hot tire pickup
- Provides a terrazzo flooring look in a high-gloss finish that resists cracking, peeling, chemical spills, hot tire pick up and provides a showroom quality floor in 1-coat that lasts
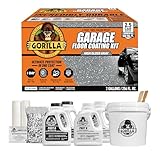
- Ultimate Protection in One Coat: 2-part 100% solids epoxy delivers, incredibly durable, exceptional resistance to chemicals, abrasions, salt, oil, gas, and hot tire peel-up that is ideal for garages, basements, workshops, & more.
- High Gloss Finish: Achieve a showroom-quality finish that is crack resistant, peel proof, low VOC, while enhancing the appearance and performance.
- Covers up to 550 sq. ft.: Includes two gallons of premium material – enough for a thick, long-lasting coat on a standard 2.5-car garage floor.
- Drive on After 1 Day: Quick curing epoxy resin and hardener allows you to use your space 24 hours after application.
- 12 Pc DIY Kit: Epoxy resin, epoxy hardener, decorative gray blend flakes, concrete etch for proper surface prep, mixing buckets, stir sticks, roller covers, decorative and easy-to-follow pictured with printed instructions as well as how-to video guides for a seamless application.
- Durable, polycuramine concrete coating works on interior concrete surfaces including garage floors, workshops, basements, family rooms and more.Self-leveling & buildable
- Self-leveling, buildable formula is 20X stronger than epoxy with low odor and low VOC - portioned in a two-part, patented burst pouch
- Complete projects quickly; coating is walk on ready in 8-10 hours and vehicle ready within 24 hours
- Each kit covers up to 500 sq. Ft. Depending upon surface porosity
- Provides a terrazzo flooring look in a high-gloss finish that resists cracking, peeling, chemical spills, hot tire pick up and provides a showroom quality floor in 1-coat that lasts

- Durable, 2-part epoxy formula works on interior concrete surfaces, such as garage floors, workshops, basements and more
- Professional glossy finish is easy to clean and provides a long lasting protection that is 5X harder than 1-part epoxy floor paint
- Walk on ready in 24 hours, vehicle and drive-on ready in 3 days
- Superior adhesion coating ensures no hot tire pickup and protects against gasoline, antifreeze, motor oil, and salt
- Low odor, low VOC gloss finish provides a show room shine
Your Guide to Choosing the Best Garage Floor Epoxy Kit
Installing an epoxy floor in your garage transforms it from a dusty storage space to a clean, durable showpiece. But with so many kits available, how do you pick the right one? This guide breaks down what you need to know before you buy.
Key Features to Look For
When shopping for a garage floor epoxy kit, certain features make the job easier and the results last longer. Focus on these:
1. Epoxy Type (Solvent-Based vs. Water-Based)
- 100% Solids Epoxy (Usually Solvent-Based): This is the strongest type. It creates a very thick, tough, and chemical-resistant coating. It often requires more safety gear because of strong fumes.
- Water-Based Epoxy: This is easier to clean up and has low odor. It’s great for DIY beginners, but it might not be as tough as 100% solids for heavy-duty shops.
2. Pot Life and Cure Time
Pot Life is how long the mixed epoxy stays usable before it hardens in the bucket. Longer pot life gives you more time to work slowly. Cure Time is how long you wait before you can walk on it or drive on it. Faster cure times mean less downtime for your garage.
3. Coverage Area
Always check the kit’s stated square footage. Underestimating coverage leads to thin spots or running out of material mid-project. Buy enough for two coats if the instructions suggest it, especially for older, porous concrete.
Important Materials Included in the Kit
A good kit provides everything necessary for a professional finish. Check the box contents carefully:
- Epoxy Resin and Hardener: The two main chemicals that mix to create the coating.
- Concrete Etch/Degreaser: This prepares the concrete surface so the epoxy sticks properly. This is crucial!
- Color Pigments or Flakes: Color packs add visual appeal. Decorative flakes hide dust and minor imperfections well.
- Tools: Some kits include mixing buckets, rollers, and sometimes even spike shoes for walking on the wet epoxy.
Factors That Improve or Reduce Quality
The quality of the final floor depends on the product *and* your preparation.
What Improves Quality:
- High Solids Content: Higher percentages of solids mean a thicker, more durable final coat.
- Moisture Vapor Barrier: If your concrete slab sweats moisture from below, ensure your epoxy has a barrier layer to prevent peeling.
- Thorough Preparation: Properly etching the floor (making it feel rough like sandpaper) dramatically improves adhesion.
What Reduces Quality:
- Poor Mixing: If you do not mix the resin and hardener for the exact time listed, the epoxy will not cure correctly and will remain sticky.
- Humidity: Applying epoxy when the air is too humid or the concrete is damp causes bubbles, hazing, or a soft finish.
- Not Following Temperature Rules: Most epoxies need the garage temperature to be between 60°F and 80°F to cure correctly.
User Experience and Use Cases
User experience varies based on skill level. Beginners usually prefer water-based kits because cleanup is simple (soap and water). Professionals often choose 100% solids for maximum resistance to hot tires and harsh chemicals.
Common Use Cases:
- Standard Home Garage: Water-based or medium-solids kits are perfect for parking cars and general storage.
- Workshop/Mechanic Bay: You need high-solids, chemical-resistant epoxy to handle oil spills and heavy tool traffic.
- Showroom Finish: Clear topcoats combined with metallic pigments create a high-gloss, mirror-like finish for displaying vehicles.
10 Frequently Asked Questions (FAQ) About Garage Floor Epoxy Kits
Q: How long does the entire process take?
A: Including cleaning, etching, drying, and applying two coats, most projects take 3 to 5 days, mainly due to necessary drying time between steps.
Q: Can I apply epoxy over old paint or existing sealer?
A: Generally, no. The old coating must be completely removed, usually by grinding, or the new epoxy will peel off with the old layer.
Q: What is the most important step in the installation?
A: Surface preparation (cleaning and etching) is the most important step. Epoxy will fail quickly if the concrete is not properly opened up for the product to grip.
Q: Will the epoxy protect against hot tire pickup?
A: High-quality, 100% solids epoxy offers excellent resistance to hot tire pickup, where hot rubber pulls the coating off the floor. Water-based may struggle with this.
Q: Do I need special ventilation?
A: Yes, always ensure good airflow. Solvent-based epoxies require respirators and fans to safely disperse strong fumes.
Q: How long until I can drive my car on the new floor?
A: Light foot traffic is usually allowed after 24 hours. Full vehicle traffic should wait at least 5 to 7 days, depending on the kit’s cure specifications.
Q: What color flakes hide dirt the best?
A: Speckled or multi-toned flakes that include gray, black, and tan colors are the best at masking dirt and tire marks between cleanings.
Q: Is garage epoxy slippery when wet?
A: Yes, standard epoxy can be slick. Most kits include an anti-slip additive (like fine aluminum oxide) that you must mix in during the final coat.
Q: What if my concrete is damp?
A: Do not apply epoxy over damp concrete. Moisture prevents curing and causes bubbling. Test the floor first by taping plastic down for 24 hours to check for condensation.
Q: Can I repair just one spot later?
A: Epoxy cures as one continuous piece. Spot repairs are very difficult to blend seamlessly. It is usually better to recoat the entire area if major damage occurs.