
Do your car’s headlights look cloudy and yellow? It’s like trying to see through foggy glass, right? This dullness doesn’t just look bad; it actually makes driving at night much more dangerous. Your headlights need to shine bright for safety.
Choosing the perfect headlight restoration kit can feel overwhelming. Stores offer so many brands, and it’s tough to know which one works best or lasts the longest. You worry about wasting money on a kit that won’t clear up the haze. We understand that frustration!
This post cuts through the confusion. We will break down what makes a great kit and show you exactly what to look for. By the end, you will feel confident picking the right product to bring back that crystal-clear shine. Let’s start saving your night vision and making your car look new again!
Top Headlight Restore Kit Recommendations

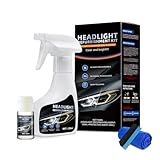
- KIT CONTENTS - Each headlight restoration kit includes (8) Step 1 Oxidation Removing Wipes, (1) Step 2 Sanding Kit, and (2) Step 3 Ceramic Coating Wipes.
- LASTS AS LONG AS YOU OWN YOUR VEHICLE! - This is a CERAMIC coating for cars that chemically bonds to your headlights and provides UV protection for as long as you'll own your vehicle.
- NO POWER TOOLS REQUIRED - Everything is included in the kit for your car. There are no tools required that could potentially damage your headlights or paint.
- RESTORES AND PROTECTS FROM UV! - Our CERAMIC coating wipes provide a layer of UV protection that will last as long as you own your vehicle. We believe in providing our customers the best products on earth, the first time.
- 3 EASY STEPS! - Cerakote's Headlight Restoration Kit is a simple, 30 minute process. Step 1: Our Oxidation Remover wipes remove stubborn oxidation. Step 2: Using our supplied sanding materials, remove any remaining deep oxidation. Step 3: Cerakote's industry leading ceramic restores the headlight to like-new!

- KIT INCLUDES: 1 - Disc Pad Holder, 3.25 in (8,2 cm) 6 - 3M Gold Sanding Discs 500 Grit, 3 in (7,6 cm) each 4 - 3M White Finishing Discs 800 Grit, 3 in (7,6 cm) each 1 - 3M Trizact Refining Disc 3000 Grit, 3 in (7,6 cm) 2 - 3M Quick Headlight Clear Co
- KITS CONTAIN masking tape, light sanding discs, wax protectant and more
- FOR USE ON plastic lenses headlights, taillights, fog lights, directional lights and more
- 3M abrasive technology removes yellowing and buildup without damaging plastic lens surface
- Easy to use choose a kit with no tools required, or for use with a common household drill

- KIT INCLUDES: 1 - 3M Trizact Refining Disc 1000 grit, 3 in/7.6 cm 1 - 3M Trizact Refining Disc 3000 grit, 3 in/7.6 cm 2 - 3M Quick Headlight Clear Coat Wipes 1 - Foam Pad with 3M Hookit Attachment, 3 in/7.6 cm 1- Disposable Glove
- FOR USE ON plastic lenses – headlights, taillights, fog lights, directional lights and more
- 3M abrasive technology removes yellowing and buildup without damaging plastic lens surface
- Easy to use – choose a kit with no tools required, or for use with a common household drill
- Save hundreds vs. replacing headlight lenses

- Quickly Restores Headlight Clarity: Removes yellowing, stains, oxidation and haze to restore clear, like-new headlights
- All-in-One Headlight Renewal Solution: Polishes away light to moderate oxidation and protects in a single step
- Buffs Out Light Scratches & Flaws: Reduces the appearance of hairline scratches, smudges and surface imperfections
- Includes PowerPlastic 4Lights Polish: Restores clarity while leaving behind a durable, oxidation-inhibiting protective layer
- Long-Lasting Protection Against Re-Oxidation: Protective polymers help guard headlights from UV and environmental damage

- Headlight Restoration Kit (GAP401) Restores cloudy, yellowed headlights and plastic lenses by removing oxidation, haze, and discoloration for a clear, like-new appearance.
- Improves nighttime visibility and driving safety by enhancing headlight clarity and increasing light output for better road illumination.
- Easy-to-use formula works by hand or machine to clean, restore, and protect headlight lenses without harsh abrasives or complicated steps.
- Leaves a protective layer to help guard against future yellowing and fading caused by exposure to sunlight, road grime, and the elements.
- Ideal for use on headlights, taillights, and clear plastic trim across all makes and models, making it a must-have for any detailing routine.

- Complete Set: Exquisite toolbox, 800g headlight repair fluid, atomizing cup + 2 lids set(contains 2 lid silicone rings), 6 sandpapers(180# – 280# – 320# – 600# – 800# – 1200#), emery board, funnel, guard tape, power supply set (110V power cord + car power cord), instruction manual. All the tools you need are included in one kit, no additional purchases are required.
- Effective Solution: The headlight repair kit can effectively eliminate scratches/cracks of car headlights and solve the problems of yellowing, blurring, oxidation, stains, aging, etc, makes it easy for you to bring back the crystal-clear shine of your vehicle's headlights, restore headlight clarity, increase visibility and safety. After repair, it can protect your car headlights from yellowing and ultraviolet damage, help delay their aging and extend the service life of car headlights.
- How It Works: The working principle of our kit is By grinding, the damage layer caused by oxidation or scratches on the surface of the headlight can be removed to make the surface smooth and cover them with a new protective film. After the repair, the headlight lamp surface is smooth, bright, uniform, flawless, like new. Please note that polishing is the most important step. After polishing, there are no scratches, trachomes or cracks and all brightening is correct.
- Easy and Convenient: The repair liquid is high transparency, strong adhesion, 800g high-capacity can repair about 48 - 70 headlights. No need to remove headlights, no high temperature baking lights, two power sources can be used at any time whether at home or outside. Easy to use, professional results without prior knowledge. Eliminates the cost of replacing headlights and saves money.
- Wide Application:Our headlight repair set is professionally made, stable performance, has long service life. We focus on the quality and details of our products, and strive to satisfy every customer with our high-quality products. If you have any questions or dissatisfaction with the product, please talk to communication us.

- Easy 3 Steps: Wash lens for free of dust or dirt. Step 1: Wet sanding lights with souring pads, P1000, P3000, P5000 discs. Step 2: Polish it with foam pad and compound. Wash it and wipe dry. Step 3: Seal with UV block coat. Enjoy crystal-clear results
- Restores Headlight: Provide a deep clean to heavy yellowed, cloudy, dull and hazed lenses. Remove haze, oxidation, cloudiness and corrosion. Restore the clarity and shine to see down-road at night. Enhance visibility and safety for night driving
- Save More: POLIWELL headlights restore kit easy to store and enough to restore about 2 lenses. Designed for use on headlights, taillights, fog lights, directional lights and more. Instructions were clear printed on the packaging
- Professional Results: With a common household drill, it is easy to restore the heavy cloudy and scratchs in your headlights. Maintain and protect all types of smooth, shiny plastic and acrylic headlights
- Excellent Diy Set: 2 pcs 3 in 800 grit scrubber pads, 4 pcs each of 1000, 3000 and 5000 grit sanding discs, back-up sanding pad, drill attachment, soft sponge interface pad, 10 meter masking tape, spray bottle, polishing compound and UV coating
- Make Your Vision Brighter:This New Automotive Headlight Restoration Kits effectively clears up yellowing and cloudiness, shine your car headlamp in just minutes, instantly improving brightness and visibility
- Fast-Acting: This instant headlight oxidation removal spray works in minutes. This headlight cleaning kit quickly and easily resolves cloudy or yellowed headlights, saving you time
- Easy to Use: Simply shake 120ml of headlight restoration fluid, spray on your headlights, and wipe with a microfiber towel. No special tools or complicated steps are required, making this headlight repair kit easy for everyone
- Wide Compatibility: This headlight cleaning kit is suitable for both plastic and glass lenses on a variety of vehicle models, ensuring versatility for daily maintenance. This universal headlight restoration kit, suitable for all vehicle models, is a great addition to any car maintenance routine
- Lnstructions For Use: Step 1-Cleaning: Evenly spray the cleaner onto the headlight surface. Let it sit for 30 seconds, then wipe with a clean towel. Step 2-Rinsing: Thoroughly rinsse the headlight surface with clean water to remove all cleaner, then use a dry cloth to wipe away any water spots. Step3-Restoration: Squeeze an appropriate amount of crystal coating liquid onto the sponge applicator, wipe the headlight surface carefully in one direction to complete restoration.( Tip: when applying the coating liquid, do not scrub back and forth. Complete the wiping in a single pass in the same direction to protect the coating layer.)
The Ultimate Buying Guide: Bring Back Your Headlight Shine
Are your car headlights looking cloudy, yellow, or just plain dull? Don’t worry! A headlight restore kit can make them look almost new again. This guide helps you choose the best kit for your car.
Key Features to Look For
When shopping for a headlight restore kit, look for these important features. These details tell you how well the kit will work.
- All-in-One Solution: The best kits include everything you need. You should find sandpaper of different grinds, a polishing compound, and a UV sealant.
- UV Protection: This is very important. The sealant protects the clear plastic (polycarbonate) from the sun’s harsh rays. Good UV protection keeps your headlights clear for longer.
- Ease of Use: Look for kits with clear, simple instructions. Some even come with an applicator pad or small cloth.
- Longevity: Check how long the protection lasts. Some kits promise protection for six months, while others claim several years.
Important Materials in the Kit
The materials inside the box matter a lot. You are essentially sanding down the damaged outer layer and then polishing it smooth again.
Sanding Supplies
Kits use sandpaper to remove the damaged, hazy layer. Good kits offer several grits—coarse grits first, then finer grits for smoothing. You want enough sandpaper to complete the job without running out.
Polishing Compound
This is a creamy substance that makes the plastic smooth and shiny. Look for a compound that feels fine, not gritty. A high-quality polish helps eliminate tiny scratches left by the sandpaper.
Protective Sealant (UV Clear Coat)
This liquid is the final step. It seals the fresh plastic surface against future damage from sunlight and weather. Make sure the sealant is specifically designed for polycarbonate lenses.
Factors That Improve or Reduce Kit Quality
Not all kits work the same way. Some factors greatly affect the final result.
Factors That Improve Quality:
- High-Quality UV Sealant: A strong sealant lasts longer. It resists yellowing better than cheap alternatives.
- Multiple Sandpaper Grits: Having at least three different sanding pads (e.g., 800, 1500, 3000 grit) ensures a smoother starting surface for polishing.
- Included Applicators: Having specific foam pads or microfiber cloths included means you do not accidentally use a dirty rag that could scratch the new finish.
Factors That Reduce Quality:
- No UV Protection: If a kit skips the sealant step, the haze will return quickly, sometimes within weeks.
- Only One Sandpaper Grit: Using only one type of sandpaper often leaves deep scratches that the polish cannot fully remove.
- Weak Polish: A thin, watery polish will not fill in the microscopic sanding marks, leaving the lens looking dull instead of crystal clear.
User Experience and Use Cases
Most people use these kits for cars, trucks, or motorcycles that sit outside a lot. You need patience to get the best results.
The Process Experience
A good user experience means the process feels manageable. You will need water for wet sanding (check if your kit supports this). The hardest part is often the sanding—it takes effort to remove the old, damaged plastic. If the instructions are confusing, the process becomes frustrating.
When to Use a Kit
Use a kit when your headlights are:
- Slightly yellow or hazy (early stages of oxidation).
- Showing minor surface scratching from road debris.
- Dimming your nighttime visibility.
If the plastic is severely cracked or has deep gouges inside the lens, a restore kit might not fix everything. For minor cloudiness, however, it is a fantastic, cheap solution.
Headlight Restore Kit: 10 Frequently Asked Questions (FAQs)
Q: How long does it take to restore headlights?
A: Most kits take about 30 to 60 minutes per headlight, depending on how bad the damage is and how fast you work.
Q: Do I need to remove the headlights from the car?
A: No, almost all kits are designed for on-car application. You just need to tape off the surrounding paint carefully.
Q: Will this work on plastic covers that have deep cracks?
A: Restore kits work best on surface haze and light yellowing. Deep cracks or damage inside the lens usually require replacing the entire headlight unit.
Q: What is the most important step in the process?
A: Applying the UV sealant correctly is the most important step. It protects your hard work from the sun.
Q: Do I need water for sanding?
A: Many kits require “wet sanding.” You dip the sandpaper in water before use. This keeps the plastic cool and washes away debris, leading to a smoother finish.
Q: How long should the restored shine last?
A: If you use a quality kit with a good UV sealant, the shine can last anywhere from one to three years, depending on how much sun your car gets.
Q: Can I use this on regular glass headlights?
A: Headlight restore kits are made for plastic (polycarbonate) lenses. Do not use them on real glass headlights.
Q: What if I sand too much?
A: If you sand too aggressively with a coarse grit, you will leave deep scratches. You must then use finer grits to remove those deeper scratches before polishing.
Q: Do I need to clean the headlights before starting?
A: Yes, always clean the headlights thoroughly with soap and water, and then wipe them down with rubbing alcohol to remove all wax or dirt before you start taping and sanding.
Q: Are these kits safe for car paint?
A: The product itself is for plastic. You must use painter’s tape to cover the painted bumper and trim around the light. If the polish or sealant gets on the paint, wipe it off immediately.